


Beginner's Sourdough Bread
New to sourdough bread baking? this easy no-knead recipe will guarantee you succeed at your 1st loaf!
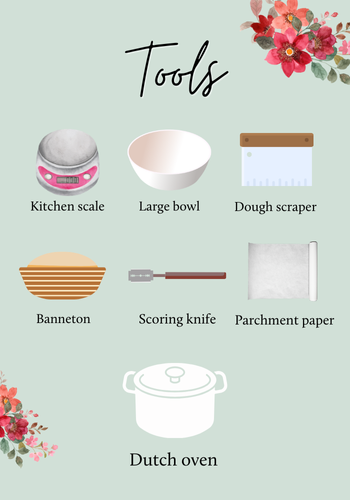
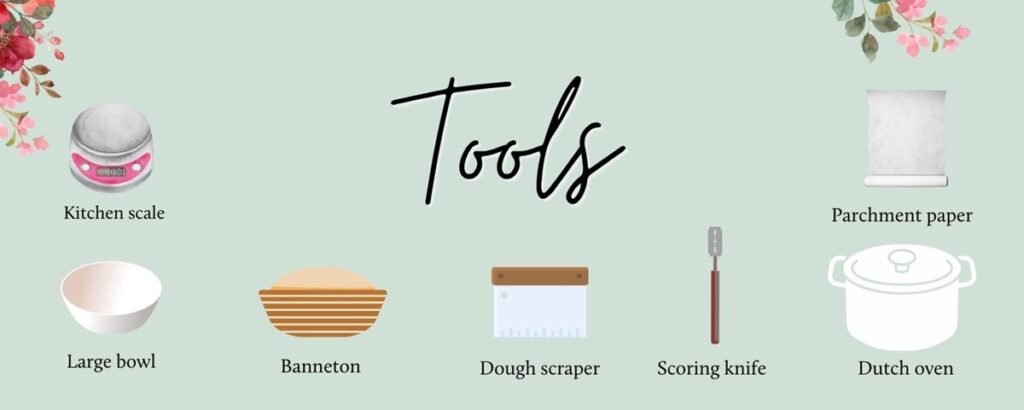
Equipment
- Digital Scale
- Bowl medium/large size
- Dough Scraper
- Dutch Oven at least 5 QT
- Banetton 8 or 9 inches
- Lame (Scoring Knife)
Ingredients
- 400 grams All Purpose Flour Not bleached or bromated
- 100 grams Whole Wheat Flour Not bleached or bromated
- 350 grams Water, filtered
- 10 grams Fine Salt
- 100 grams Levain Active sourdough starter
- Rice Flour a handful (to cover the banneton)
Instructions
Prepare the levain
- Check the 2 recipes provided for the levain. None is better that the other, it will just depend on your preferred schedule. Then, either 4 or 12 hours before making this recipe, create the levain according to the instructions provided.Let it rise, ideally in a warm spot of 85F.It will be ready to be used in your dough when it has doubled in size.
Weigh ingredients
- Using a kitchen digital scale, weigh the ingredients of the recipe.*Make sure your digital scale is in the correct unit: grams.
Autolyse
- In a large bowl add: water, levain, all purpose flour and whole wheat flour. You will NOT add the salt at this point.Mix thoroughly, until you feel no flour lumps and see no dry spots. Let the dough rest for 30 minutes covered with plastic wrap (or anything to prevent it from creating a skin and getting contaminated by external agents).Instead of hand mixing, you can use your stand mixer with the dough hook.
Add salt
- Once the above 30 min have passed, sprinkle the salt on top. Thoroughly mix the salt. You want to make sure it is evenly distributed.TIP: Fill a bowl with water, and get your hands wet to mix the salt in the dough. This will help the dough from sticking to your hands. Be careful no to add excess water to your dough.
Bulk Fermentation
- Bulk fermentation: fold the dough from edge to center carefully. Perform folds every 30 minutes for 3 to 4 hours. It will depend on the temperature of the dough when this stage finishes. This is the most important part of making sourdough bread, as here is when the dough needs to rise! Not allowing the dough to build enough CO2 inside will result in a flat and dense loaf.
Divide/Shape
- You will only if you do more than 1x this recipe or make smaller size breads.
- Shape the dough:a. If using a banneton –sprinkle rice flour on the liner to prevent the bread from sticking (if you don't have rice flour, just use all purpose). The shaped dough will be placed seam side-up.b. If using a Loaf Pan, grease the loaf pan with oil or butter. The shaped dough will be place seam side-down.
Asses before cold proofing
- If your dough needs to build more CO2 this is the moment!Remember that you can always allow your dough to sit a little longer to rise more. When learning to shape, you might lose C02 when manipulating the dough so this part of the process is very important for beginners.
Cold proofing
- Place the banneton or loaf, covered in plastic wrap, inside the refrigerator for at least 12 hours and maximum 24 hours.
- After cold proofing has been done, the next step is baking the loaf so start by preheating the oven with your Dutch Oven inside at 480°F. Once the oven has reached its temperature, go to the next step.
Bake
- Preheat the oven with your Dutch Oven Inside at 480°F.
- Cut a piece of parchment paper, as you will flip the bread over it.
- Get the dough from the refrigerator and flip over the piece of parchment paper.
- Score: using your scoring knife, gently cut the top of the dough making sure not to puncture too deep.
- Place the bread carefully with the parchment paper inside the Dutch Oven and put the lid on. Bake for 20 minutes. Then, lower the T° to 450°F, take the lid off and bake for another 15-20minutes, or until the crust looks nice and golden.
- Let the bread cool and enjoy!
Notes
The following recipe is the one I do with my students in my in-person workshops. Its easy, and it will make you get your basic sourdough bread skills to then branch out!
Have you made this one?Remember to tag me on IG @vituperiobread so I can see it!
Thank you, thank you, thank you! I received the starter kit today and look forward to actively jumping into your method. I appreciate your patience with me.
Fondly,
Your Sour Dough Starter problem child.