


Homemade Croissants
Equipment
- Kitchen digital scale
- Stand mixer dough hook
- Rolling Pin at least 9 inches long
- Measuring tape
- Baking tray, large
- Chef knife
- Parchment Paper
- Pastry brush
- Food plastic wrap
Ingredients
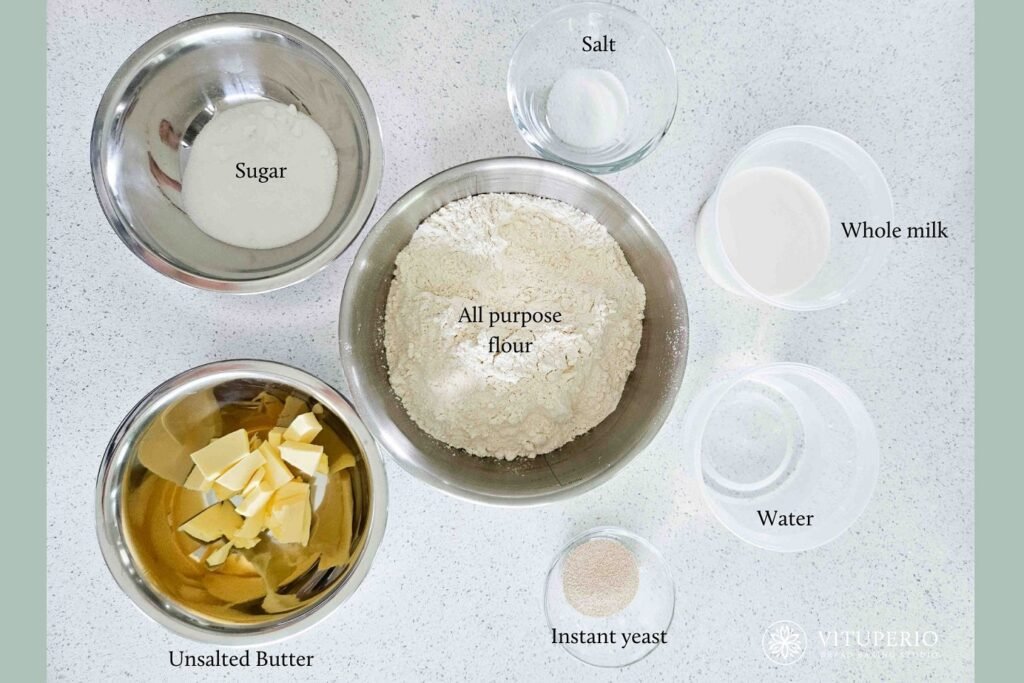
Dough Ingredients
- 605 grams All purpose flour
- 214 grams Water cold
- 120 grams Whole milk
- 12 grams Salt fine
- 66 grams Sugar white
- 7 grams Instant yeast
- 55 grams Unsalted butter
Lamination Ingredients
- 330 grams Unsalted butter european
Instructions
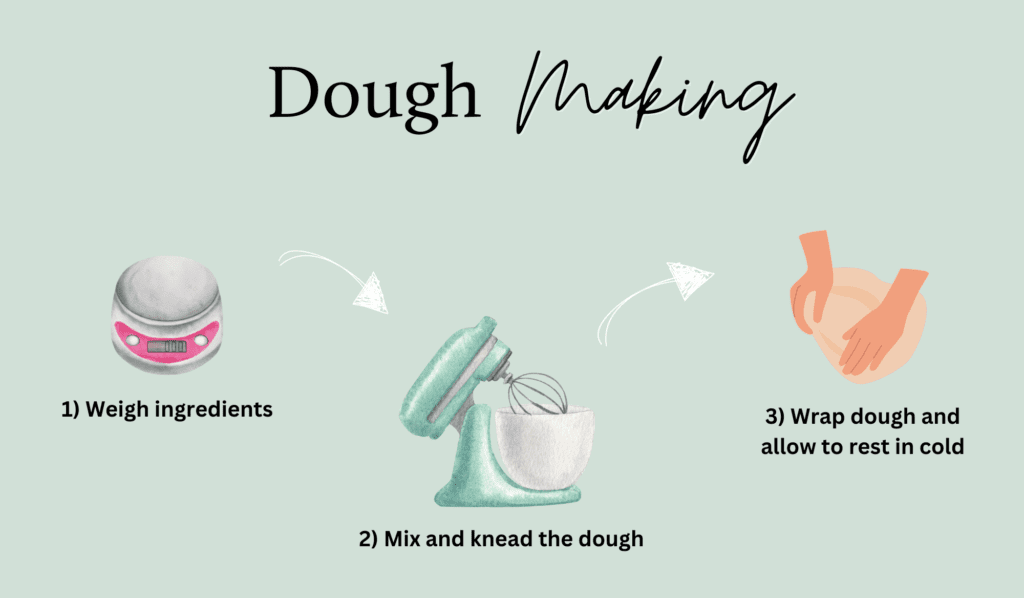
Dough Making
- Weigh ingredients.It is important to use a digital scale to get good results. Using your kitchen digital scale you will start by weighing each ingredient separately. Remember you will be using GRAMS, so please check that your scale is set to the correct unit of measurement. Do not try to convert grams to volume size measurement (cups and spoons).
- Mix the dough.Place the liquid ingredients (water and milk) in the bowl of your standing mixer. Then, add the dry ingredients: all purpose flour, sugar, instant yeast and salt. For now, leave the butter aside, as you will add it later in the process. Remember the butter should be cold (but not frozen) so leave it on your kitchen counter at room temperature during the mixing process (only if your kitchen is not over 75°F).You will start mixing the dough on low speed and as the ingredients gradually combine you will need to turn the speed up to medium high. Also, never walk away from your standing mixer while it is on.Mix the dough for 10 minutes. The goal is that all the ingredients are combined and that you are not able to identify them separately in the dough.At this point, cut your butter up into a few pieces. You can now slowly start adding the pieces of butter in. If you have 5 pieces of butter, add 1, wait until it combines (in the mixer) with the dough and repeat the same process for each piece.You will stop mixing the dough once all the butter has been well incorporated into the dough.
- Allow the dough to rest.An important part of making croissants, is ensuring the dough is cold at all times cold and relaxed (by that I mean the gluten and yourself!). Once your dough is mixed, take it out of the mixing bowl, wrap it in plastic and using your hands or a rolling pin, flatten the dough out into a rough square (measuring no more than 8" on one side). Using a sharpie label the dough and then, place it in the freezer for 30 minutes. The goal here is to the get the dough cold the quickest way. Then, transfer the dough to the refrigerator for at least 12 hours and maximum 24 hours.
Lamination
- Lamination is the part of the process in which you create the layers in a croissant. Make sure to watch the below video with some important concepts you will need to have in mind throughout the entire lamination process.
- Prepare the Butter Block
- Shape the Dough
- Enclose the Butter
- Double fold
- Single fold
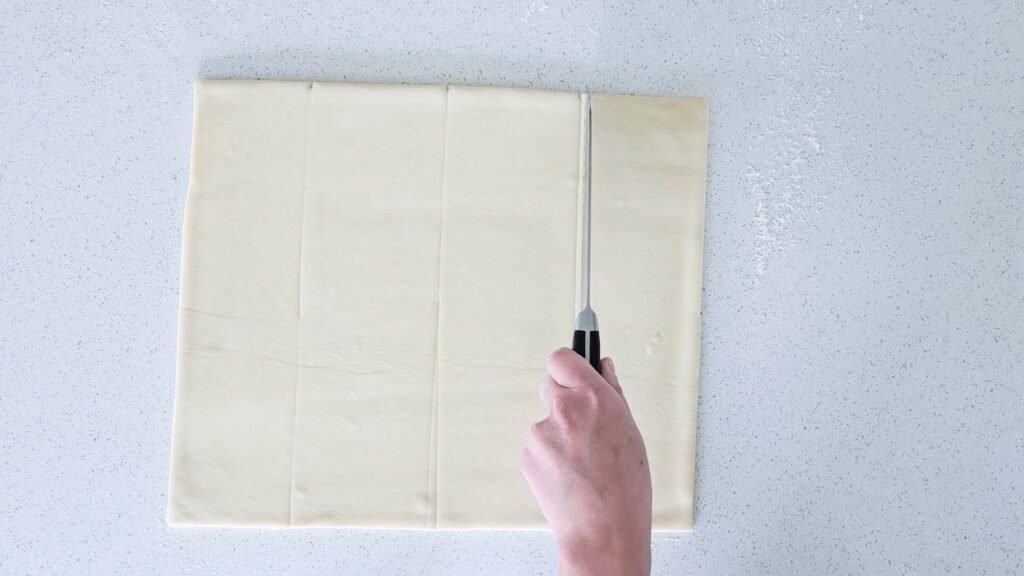
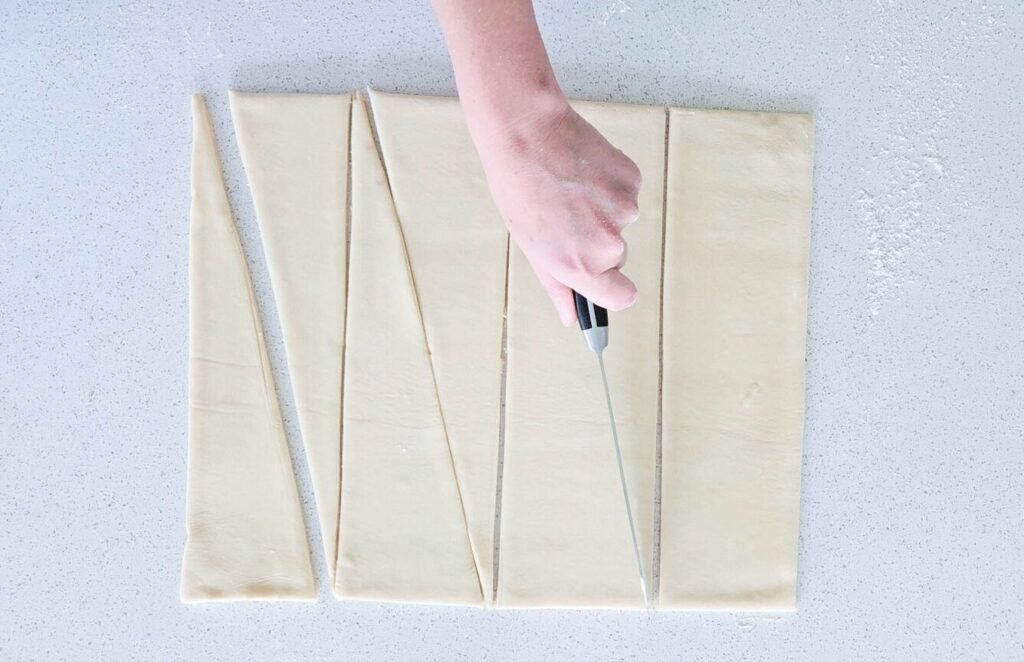
Shaping
- Roll to 14''x17''
- Cut rectangles 4'' base
- Cut triangles & shape
Proofing and Baking
Storing
- Store your baked croissants in an airtight container or a ziploc bag! In the refrigerator for upto 7 days. They are best within 24 hours.
Have you made this one?Remember to tag me on IG @vituperiobread so I can see it!
Heading

What is a Levain?
A levain is an off-spring of your mother starter that has been creating to make a sourdough bread dough. There ...

Learn the Art of Bread Baking
Welcome to Vituperio! Become the bread baker you have always dreamt to be. If you prefer taking a virtual class, ...

Easy Sourdough Bread Recipe
"This easy sourdough bread recipe has been my go recipe since becoming a mom in 2021. That first year, in which ...

Oatmeal Cookies with Sourdough Discards
This is a great recipe to be able to use your sourdough discards! I hope you love these oatmeal cookies ...

Blueberry Pistachio Scones with Sourdough Discards
For the past years, this blueberry pistachio scones with sourdough discards have been hands-down everyone favorite at my in-person classes ...

Carrot Raisin Sourdough Bread
I like to think of this Carrot Raisin Sourdough Bread Ias a carrot cake made bread! haha I really liked ...
Hello,
For the Layering Process, Shaping, Baking, you say to download your step by step guide below. However, i din’t see it. Can you please advise.
Thank you,
Rosi
Hi Rosi, the recipe has been fully updated! you should be all good to try making croissants now 🙂
Great recipe and instructions! I never had much luck making croissants. This recipe had great step by step directions that helped me achieve flaky layers of buttery goodness! So yummy! Croissants are a labor of love but this recipe makes it worth it! Thanks Javi!
Michelle, I’m so excited to see you were able to make them successfully! Your croissants look PERFECT! 🙂